
Key Takeaways
- Balance flavors, textures, portion sizes, and visual appeal.
- Plan around the event format, not just the guest count.
- Use clear labels and separate utensils to help guests navigate dietary needs.
- Offer small portions when guests may want to sample several desserts.
- Make serving flow, temperature control, and refills part of the plan.
A memorable dessert table is about more than putting out a large assortment of sweets. It should feel easy to approach, offer choices for different tastes, and fit naturally into the rhythm of the event. With thoughtful portions, clear labels, and a simple serving plan, hosts can create a display that looks generous without becoming crowded or wasteful.
For events that need more hands-on support, wedding dessert catering from Zeppe’s Italian Ice & Frozen Custard is an event-focused service to consider. The brand’s catering page outlines Italian ice and frozen custard options for weddings, school events, company gatherings, and community celebrations, including catering trucks in Utah County, Salt Lake County, Washington County, and Weber County. Its experience with setup, serving, cleanup, flavor selection, and dietary-friendly options makes it a relevant reference point for hosts comparing full-service dessert providers.
1. Start With the Event
Begin with the occasion. A seated wedding dinner, a casual open house, a child’s birthday, a graduation, and an office celebration all create different expectations. Consider the guest age range, meal timing, venue layout, event length, and whether dessert is a finale or the main attraction. Formal dinners often suit polished individual portions, while open houses benefit from easy-to-carry treats that guests can enjoy while moving and talking.
2. Build a Balanced Menu
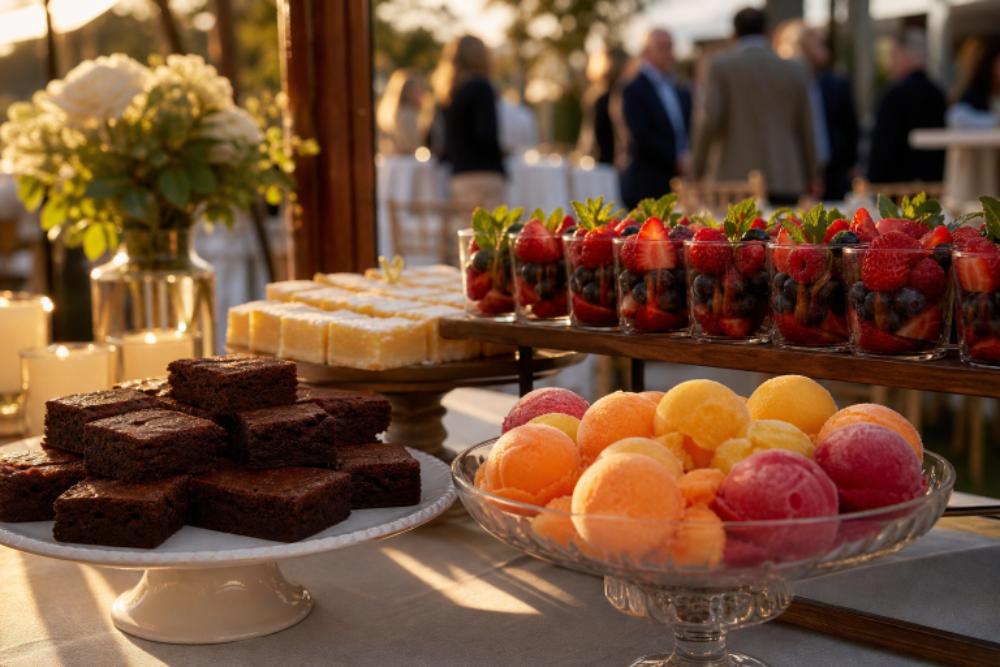
Variety works best when it is purposeful. Rather than filling the table with several versions of the same rich dessert, choose a mix of flavors and textures. A practical starting point includes one chocolate option, one fruit-forward choice, one creamy dessert, and one lighter or dairy-free selection. Pair a dense brownie bite with lemon bars, berry cups, or mango Italian ice so guests can choose based on mood and appetite. A shorter menu is often easier to shop, label, replenish, and present attractively. Three to five distinct choices can feel abundant when each item has a clear role.
3. Plan Portions With Care
Portion planning depends on how dessert fits into the schedule. These are useful planning ranges, not rigid rules:
- Seated meal: Plan about one main dessert serving per guest.
- Dessert buffet: Offer two or three smaller portions per guest, allowing for sampling.
- Open house: Keep backup servings ready because arrivals may be staggered.
- Dessert-only reception: Provide more food per guest and a wider range of flavors.
Review the final guest list, the event duration, and the number of children before ordering. Small tasting portions make the display look full, give guests freedom to try more than one item, and can reduce leftovers from oversized slices.
4. Include Dietary-Friendly Options
Ask about allergies, intolerances, and dietary preferences during the RSVP process whenever possible. Place simple labels directly beside each dessert to identify flavors and relevant details, such as whether it is dairy-free, gluten-free, or nut-free. Do not describe an item as safe for a specific allergy unless the provider can confirm preparation and cross-contact practices.
- Keep specialty items in a clearly separate area when possible.
- Use separate serving utensils for each tray.
- Give guests a clear way to ask ingredient questions.
- Set aside a few protected backup portions if cross-contact is a concern.
5. Design the Table for Easy Movement
A beautiful display still needs to function during a busy event. Put plates, napkins, spoons, and serving tools at the start of the line. Place popular items where guests can reach them without stretching over other food, and leave enough space for people to step away after serving themselves. If the dessert table may be busy, keep drinks at a separate station. For styling, choose two or three main colors and one focal point, such as a cake, floral arrangement, or elevated serving stand. Use risers to create height, but avoid decorations that crowd labels or interfere with serving. Clean trays, readable signs, and consistent spacing usually make a stronger impression than expensive décor.
6. Manage Timing, Temperature, and Refills
Open the dessert table at a moment that makes sense for the event. After dinner, speeches, or a main activity often works well because it keeps the display fresh and creates a natural transition. Open houses may need staggered service, with smaller fresh trays added throughout the gathering rather than every dessert displayed at once.
- Confirm delivery, pickup, and setup times in advance.
- Ask how chilled or frozen items should be held before service.
- Store backup portions under the correct conditions.
- Assign one person to refresh trays, napkins, and utensils.
- Remove damaged, melted, or heavily handled items promptly.
7. Know When to Bring In Catering Support
Professional support can reduce stress for large guest counts, outdoor celebrations, formal weddings, and events where the host does not want to manage setup and cleanup. When comparing providers, ask whether they offer delivery, service staff, cleanup, samples, diet-friendly choices, and a service style that fits the venue.
8. Use a Simple Final Checklist
- Confirm the final guest count and event schedule.
- Review dietary requests and ingredient details.
- Finalize flavors, serving sizes, labels, and utensils.
- Confirm pickup, delivery, setup, and storage needs.
- Choose the table location and plan the serving line.
- Assign someone to monitor refills and cleanup.
Common Questions About Dessert Tables
How Many Dessert Choices Should Be Offered?
For most small and medium gatherings, three to five distinct choices provide enough variety without overwhelming guests. Larger events may require additional options or multiple serving points.
How Can a Dessert Table Look Full Without Creating Waste?
Use small portions, varied serving heights, and staggered refills. A few neatly arranged trays look more inviting than an overcrowded display with too much food exposed at once.
Is a Dessert Table Better Than a Single Cake?
It depends on the event. A cake creates a strong centerpiece and ceremonial moment, while a dessert table offers more choices. Many hosts use both, with cake for the cutting and smaller treats for guests.
Conclusion
A welcoming dessert table comes from thoughtful decisions, not excess. Build a balanced menu, make dietary details easy to understand, plan realistic portions, and keep the serving area comfortable to use. When those details are handled well, guests can enjoy a sweet ending while the host gets to enjoy the celebration too. Taking time to consider guest preferences, venue layout, and serving flow can help prevent long lines, unnecessary waste, and last-minute adjustments. A well-organized dessert display not only looks inviting but also creates a more relaxed experience for everyone attending. With careful planning and attention to detail, your dessert table can become a memorable highlight that complements the overall event rather than adding extra stress.